
Years and years ago (like first year teaching years ago) I used to use Microsoft Excel to create multi-page posters that I could piece together to have great professional-looking typed posters without having to pay for poster printing. You should know, I am also a font snob and I am not in love with the font choices provided in the Microsoft suite (we can’t add fonts onto district computers). Ahhhh but the font choices in Google Apps… FANTASTIC!!! I haven’t had a use for this old poster-making hack again until recently, but thought it was worth a share in case you ever need to print a poster or large multi-page title in a pinch and/or on a budget!
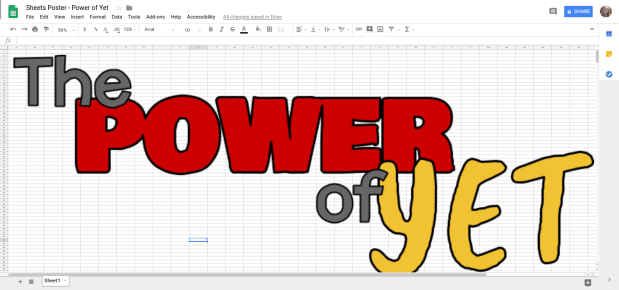
Here’s an example of a poster I printed using Google Sheets that used 6 sheets of paper taped together to create this title for a display:

If you’re thinking, “How can she use Google Sheets to do THAT?!?” I can’t wait to show you, because it is SOOO EASY!
Here’s how to make your own:
- Open Google Sheets
- Create and/or insert your poster image
- Go to Insert, Drawing, and use Word Art, Text Boxes, Shapes, etc. to create your poster, or
- Create your poster in Slides or Drawings and then download as a picture (,jpg or .png) and then insert the picture into your Google Sheet
I created this image within Sheets using Insert, Drawing – look how small it looks when first inserted:

- In your Google Sheet, go to View, Zoom, 50% so you can see a huge portion of your screen.
- Ignore the cells – they are just background noise for this project.
- Stretch out the image so it takes up as much room as possible
- Hold down shift as you click and drag a corner to keep the proportions equal.
Now, set it up to print as a multi-page poster:
- Go to File
- Make sure your paper size is set to letter (if that’s what you’re using)
- Under “Page Orientation”, choose between Portrait and Landscape based on how you want to peice together your poster
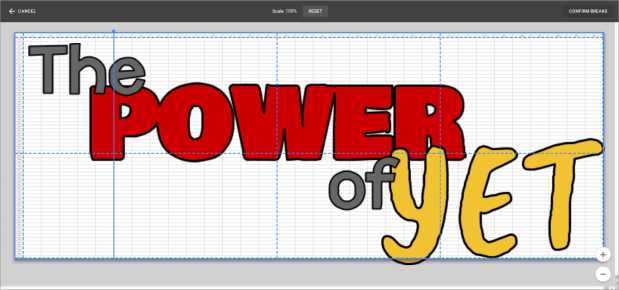
- Choose “Set Custom Page Breaks” in order to drag and drop the page breaks to places that would be easiest to piece together
- One great thing is that when it prints, a little overlap is printed on each piece for easy matching up.
- Move the dotted lines that represent page breaks until you are happy with how it will print.
In the example below, the poster is going to take up 8 sheets of paper – you can tell by where the blue dotted lines are.
However, if I start to move those lines around, I can manipulate this and get it down to only one row of landscape sheets of paper. You may have to use the plus and minus buttons in the bottom right corner to see your entire poster. Here, I’ve widdled the poster down to two sheets of paper:
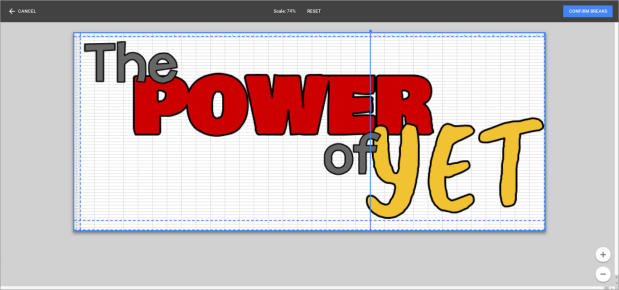
- Once you’re happy with the page breaks, click “Confirm Page Breaks” in the top right corner.
- Double check that under “Formatting”, “Show Gridlines” and “Show Notes” are NOT checked.
- Click the blue “Next” button in the top right corner.
- Select your printer and PRINT!
- Once all the pages have printed, choose one side (either right or left and top or bottom) to cut – don’t cut both or you won’t have anything to tape to/glue to.
- I recommend using spray adhesive because it lays totally flat and you don’t end up with any “fly-aways” or tape showing. People will seriously NOT know if it pieced together if you use spray adhesive.
- My favorite is 3M Super 77
I can think of sooo many fun uses of this fun little poster-making hack:
- Create digital anchor charts with your class (for the digitally apt but drawing and handwriting impaired – like me) and then print, tape together, and post in your classroom
- Have students create digital posters for projects in Drawings or Slides and send them to you as images (File, Download as, .png or .jpg) Then you (as the teacher) could poster-fy them and have students tape or glue together for analog displays
- Help students use their digital know-how to create posters when they are running for student council or promoting a fundraiser, or putting other signs in the hallways of our schools
- Create amazing bulletin boards and displays
- Create an awesome class banner for field day – Akers’ Anacondas did this and (not to brag) we definitely won the spirit award for our awesomeness!
- Blow up ANY great graphics you want displayed in your classroom or school!
Remember, you don’t have to go landscape and long like I did, you can create ANY size, ANY shape you want with your poster! Try it out! 🙂
Wanna play around with my Power of Yet poster? Click here to grab a copy. Have fun!

Wow! You are such an awesome resource!! I learn so much from you!
LikeLiked by 1 person
Thanks Misty!!!
LikeLike
AMAZING! Just like you!
LikeLiked by 1 person
Oh my gosh! Thank you!!! 🙂
LikeLike
Takes me back to the days of Bannermania, Broderbund PrintShop and the like. Great resource.
LikeLiked by 1 person
Haha!!! You’re right… going old school!!!
LikeLike
any tips on what to do if the image doesn’t show up on the print preview?
LikeLiked by 1 person
having the same problem
LikeLiked by 1 person
same
LikeLike
Weird! I’ll go play around and see if I can figure this out!
LikeLike
how do you know how big it is? I want to make a 40×50 cm poster but it won’t show how big!?
LikeLike
I’m not sure!!! You stumped me. I am going to do a little work on this!
LikeLike
So helpful! I’m an RA, so I will definitely be using this more in the future
LikeLiked by 1 person
It worked! Thank you so so much!
LikeLiked by 1 person
YAY!!!! Love this little trick 🙂
LikeLike
Oh, my goodness! Game- Changer!! I have my 1st classroom & was trying to think of ways to decorate without breaking the bank… & here it is!! Thank you!! My 1st poster is a quote from Albert Einstein “I have no special talents, I am only passionately curious.” Thank You!
LikeLiked by 1 person
I am so thrilled this tip helped!!!
LikeLike
I am so excited to find this! I tried it and my only issue is that it isn’t printing everything. I’m missing the first page and it is cutting off the text from pages 4, 5, and 6. Any tips about what I may have done wrong?
LikeLike