
This summer, our district is providing live remote instruction utilizing Zoom and Schoology for summer school. I’m not a part of summer school, but have been lurking on facebook and twitter to learn from those who are! I’ve been most interested in HOW teachers are sharing content – HOW they are keeping themselves and students on track – and WHAT has been most beneficial. The constant I’ve seen in social media posts, conversations, and examples shared with me has been having a Google Slide Deck for the teacher to teach from throughout the day that contains all links, videos, examples, reminders (to self and students) all in one place. This Slide Deck is NOT shared with students for them to click through, but for them to see on the screen as the teacher is talking and teaching (teacher shares their screen). This has been helpful because (obviously) everything is in one place, but also because it is visual for students to easily follow along with.
I began to look for good examples online and found MANY (ya’ll – just google “daily slide deck” and you’ll find a bunch) but no matter what I find, there is always something I want to tweak or change (Also, I am not about paying for stuff I think I can make myself). So I decided to make my own, and I wanted to walk you through creating YOUR OWN as well. I think whether you are teaching face-to-face, online, or some hybrid of both, having all the links, videos, times, schedules, EVERYTHING you need in one slide deck is so beneficial! Before I dig in, if you are interested in seeing what I created and grabbing a copy to edit/tweak/make your own – here is what I came up with:

Grab a fully editable FREE copy of my Daily Slide Deck by clicking this link.
Okay… so how can you make one of these for yourself??? Or even just edit some parts to make it perfectly and uniquely yours??? Follow my steps with animations below OR watch my tutorial video at the bottom!
STEP BY STEP CREATION TIPS:
I started with a solid black header with a white spotlight. You can create this effect by inserting a rectangle that takes up the entire width of your slide and changing it’s fill color to black and then inserting an oval on top and changing it’s fill color to white with and transparent border.

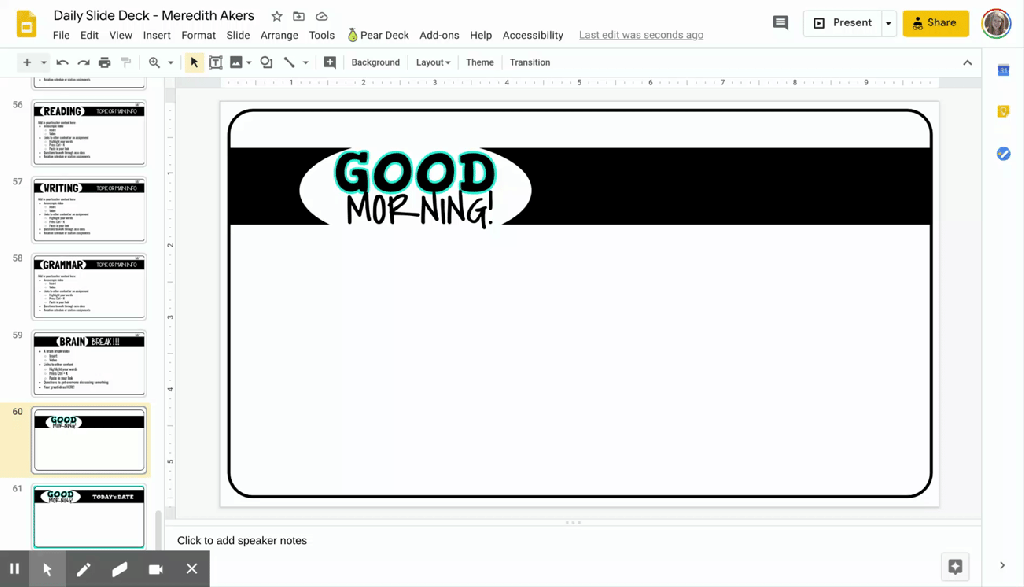
Next, I added in words. I am not ashamed to admit it – I am very persnickety about my fonts!!! You may have different opinions, but I personally like to like to pair big, bold, and chunky fonts with light, thin, or handwriting-style fonts. For example:

See how the word FONT (above) has a pink outline that matches the slide border? You can get this effect by using WORD ART! Start by going to Insert, Word Art. Unlike a text box, Word Art will open up a tiny box for you to type your text into. Once you hit enter, your Word Art will appear. Think of this as a picture instead of text. To change ANYTHING, you’ll have to make sure the blue box appears around it (just like with an image or clip art). Immediately change the font – it defaults to terrible. You can size Word Art down just as you would an image – click a corner. Pro Tip: hold down the shift key while resizing to keep things proportionate and avoid any squishing. Now – for that cool outline effect I have above… you can change the fill color of your word art by clicking on the paint fill bucket and the outline color using the pencil icon. You can even change how thick the border is! See my example of making Word Art like this below:
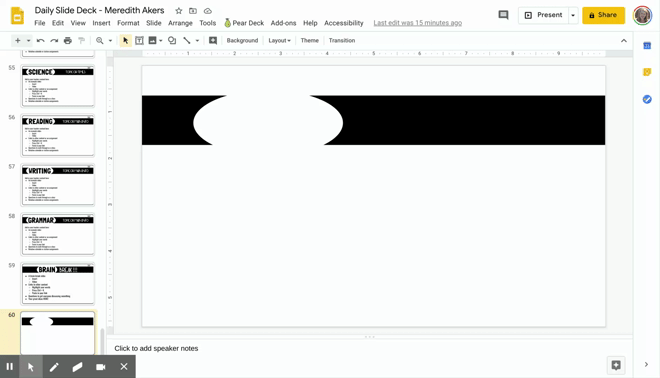
You can add a border around the outside edge of your slide by drawing a rounded corner rectangle across your slide. I like to change this rectangle to have a white fill and a black border. You can then adjust your black header bar to align with the edges of the border.

You can add a splash of color by changing the background color to anything you like. It is also fun to make the border of some of your Word Art use this same color.
Want to know even more about how I created mine? Follow along with me as you create your own:
What will you change or tweak about my Daily Slide Deck? OR will you start from scratch and create something all your own??? I’d love to know what you include and what you change to make it perfect for you and your class!
PS – HUGE SHOUT OUT and THANKS to Erika Sanchez and Ann Pruitt for sharing their teaching slide decks with me so I could learn what is being used and what is helpful!!!

I just want to say thank you for another AMAZING bunch of precious hints and tips and a totally useful slide deck. You’re great, Meredith!
LikeLiked by 1 person
Oh my goodness! Thank you!!!
LikeLike
The video tutorials in the post are super helpful, great idea!
LikeLiked by 1 person
Thank you! I’m so glad they were helpful
LikeLike
Loved the slides and working on mine now 🙂
LikeLiked by 1 person
Thank you for sharing additional ideas that support blended learning. I have experimented the past 4 weeks – 2 weeks with my Google Slides and 2 weeks with the provided learning management system. The embedded links within my Google Slides deck seem to load faster and my slides were more personalized for the needs of my class and our relationships.
LikeLiked by 1 person
Thanks for sharing your journey. I know it will be a lot of trial and error for all of us!!!
LikeLike
Thank you for all of these amazing resources!!! I am just trying to figure out how I would use a deck in Canvas. If the links are going to be interactive I would have to embed each one on a different page. Or attaching the whole deck as a google cloud assignment??? I am new to all of this. Thoughts???
LikeLike
When I created it, I was thinking about using it as a teacher to keep you on track teaching live – not necessary posting for student access – just for you and students to see and follow along with. So I was thinking to use it in your teaching videos or live zooms or live instruction with students… however, I will brainstorm uses like you described!
LikeLike
Thank you so much for the template! As an SLP, I’ve never used a daily deck before but am going to implement it in CFISD since I will have virtual and in person students and I am trying to think through how to keep them all engaged!
LikeLiked by 1 person
We are all stretching in new directions this year! Please watch out of you need someone to brainstorm with!
LikeLike
Great readd thank you
LikeLike